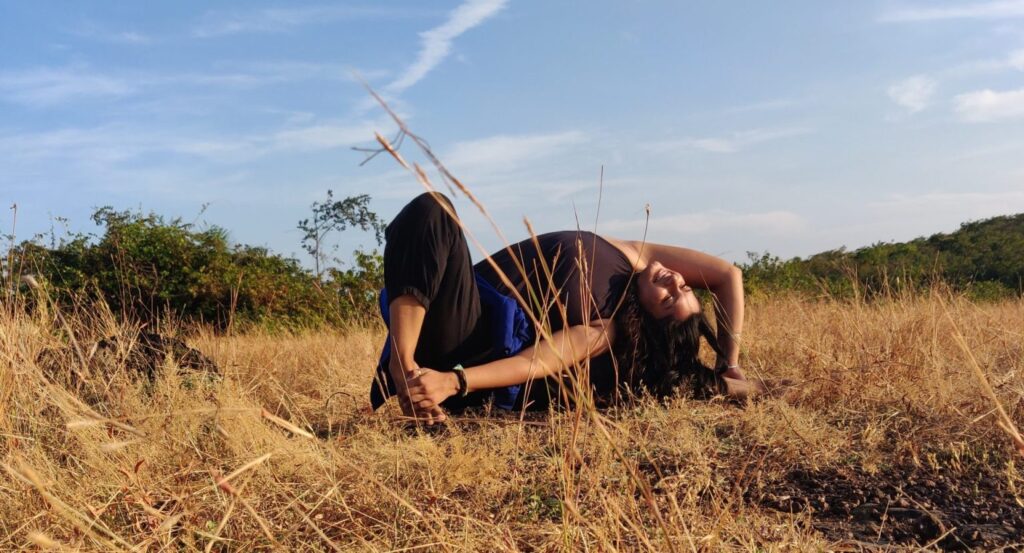
Hello yogis, welcome to the beginner’s yoga guide. Well, we all know it’s never too late to start anything new. You are on the right page if you are here to understand where and how you can start with your yoga practice today. Nevertheless, whatever age or gender you are, I will give you the top 5 easy yoga pose or yoga sequences for beginners to start from anywhere.
1. Tadasana / Mountain Pose
Introduction: Here Tad means “Mountain” and Asana means “Pose”.The first easy yoga pose to start with is Tadasana. This pose is very basic and gives stretch to the entire body covering your spine, abdomen, shoulders, and arms. This pose is also used as a preparatory pose for many other standing asanas. As the name implies one should firm their feet on the ground in such a way that they could inherit the qualities of the mountain.
Instructions:
- Stand on your mat by either keeping your feet hip distance apart or joining toes together and heels 1 or 2 inches apart.
- Keep the palms down. Fingertips stretched and entire arm active. Focus on breathing here.
- Inhale, while raising the arms either joining the palm together or keeping them apart at shoulder distance. Stretch your hands up in the sky as far as possible.
- Press the feet strongly on the ground to activate the entire leg muscles.
- Stay as long as it is comfortable.
- Exhale release the arms and stand to relax
Points to remember:
- You can gaze at your palms or just look straight.
- Focus on deep inhalations and exhalations while holding the pose
- Try to hold the position for 5 breaths in the beginning and then you can extend up to 10 breaths.
2. Balasana or Child’s Pose
Introduction: Here Bal means “Child” and Asana means “pose”. This is the 2nd easy yoga pose to increase flexibility for beginners but is very effective in terms of its benefits. This one is more like a relaxation pose. I can say that it’s our anywhere and anytime pose. It not only stretches the spine, abdomen, shoulders, and arms but also the entire lower body including butts, thighs, and ankles. Its major role also includes reducing stress, anxiety, and headaches.
Instructions:
- Sit with your butt placed on the sole of your feet. legs folded back. Ankle touching the buttocks.
- You can either join the knees in front or keep them apart for a deeper stretch.
- Inhale, raise your arms in the air, and stretch as far as possible while keeping the spine straight.
- Exhale, lean forward without lifting the butts while first placing the abdomen on your thighs then head on the floor followed by palms.
- Stay as long as it’s comfortable.
- Inhale, rise and release the pose.
Points to remember:
- Try to relax in the pose as much as possible.
- In case there is a pain in the ankles, place some soft cushion or blanket underneath the feet.
- In the beginning, try to stay in the pose for at least 5 breaths then you can extend up to 10 breaths.
- With every exhalation try to deepen the stretch.
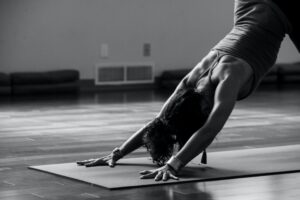
4. Adhomukhsvan Asana or Downward Facing Dog Pose:
Introduction: Here Adho means “down”, Mukh means “face”, Svan means “dog” and Asana means “Pose”. This easy yoga pose is one of the best beginner yoga stretches, which works on strengthening and stretching together. It falls under the category of forward bending or inversion. It helps in removing the stiffness from the shoulders, lower back, and hamstrings. As the name implies this yoga pose has been inspired by dogs and we all know how much flexibility they have in their bodies. All thanks to this one.
Instructions:
- Lie down in a child’s pose as explained above. Stretch your palms as far as possible.
- Inhale, slowly press the palms, tuck your toes in, lift your hips, and straighten the legs as much as possible. It is okay to have a micro bend at the knees to protect against hyperextension.
- Both feet should be in line with each other and at a hip distance apart.
- Both the arms and shoulders should also be in line with each other.
- Keep the head neutral in between the arms. Push your hips up towards the sky while pressing the heels onto the mat.
- Keep breathing deeply while gazing either at your knees or try to look at your navel. while in the pose make sure your spine is straight and stretched.
- Exhale, bend your knees, and release the pose to go back to the child’s pose to relax.
Points to remember:
- In case you are suffering from blood pressure, wrist problems, or slip disc kindly avoid the pose or practice under the guidance of an expert.
- Press the index finger and thumbs firmly on the mat to avoid pressure on the wrist.
- Focus on pushing both shoulder blades away from each other.
- In case your hip and hamstrings are too tight, bend the knees slightly and then try to press the heels on the ground.
- Avoid round back to gain maximum benefit from the pose. However, it is okay at the beginning to have slight roundness, with practice alignment can be improved.
- Hold the pose for at least 5 breaths and then increase up to 10 breaths depending upon your efficiency.
3. Saral Bhujangasana or Cobra Pose:
Introduction: Here Saral means “easy”, Bhujang means “Cobra” and Asana means “Pose”. This is an easy yoga pose that can be used as a preparatory back-bending pose as well, which stretches and strengthens the spinal columns, abdomen, neck, and back muscles. However, we all know yoga not only works at muscular or skeletal levels but also touches deeper dimensions. This pose builds strong immunity and makes the metabolic process faster. It also stimulates the endocrine system of our body. Mainly providing benefits to the thyroid gland, spleen, and as well as pancreas.
Instructions:
- Lie down on your stomach, and place your head on the mat. Palms relaxing sidewise.
- Bring your forearms in front, palms facing downwards. Shoulder and elbows in line with each other.
- You can place your legs either at hip distance apart or join the feet together.
- Inhale, press the entire forearm and palms on the floor and lift your chest.
- Stretch the neck up, and bring the shoulder blades together, while punching the chest forward.
- Stay in the pose as long as it’s comfortable while inhaling and exhaling deeply.
- Exhale, bring the head and chest down, release the pose and relax.
Points to remember:
- This pose is not recommended in case of pregnancy. Please take clearance from your doctor first.
- Make sure not to push the neck back. Keep it engaged. Slightly tilt the head up to gaze upward or you can also look straight.
- Hold the pose for at least 5 breaths in the beginning and then you can hold up to 10 breaths.
5. Savasana or Corpse Pose:
Introduction: Here Shav means “Corpse” and Asana means “Pose”. This is our last top easy yoga pose to kick-start your practice at the beginner’s level. This pose is mandatory for all levels of yoga students. It is more like a relaxation pose that can be performed in between or at the end of the practice to bring your body and mind at a certain ease from physical and mental stress. It has tremendous benefits if performed correctly at physical, psychological, and spiritual levels.
Instructions:
- Lie down on your mat while keeping your eyes closed.
- Keep your legs and hands apart. Palm facing upward.
- Loosen the entire limbs of your body from head to toe.
- Relax your legs, hips, spine, arms, neck, and head.
- Make sure to relax the facial muscles as well.
- Once your entire body is comfortable, shift your attention toward your breath. Focus on inhalation and exhalation.
- Try to feel the movement of your belly and chest and surrender completely to the moment. Feel like you are melting into the pose.
- Stay in the pose as long as you like 5 to 10 minutes are the usual recommendations.
Points to remember:
- Keep your eyes closed during the entire Savasana
- Make sure your arms or palms are not touching your body.
- Usually, people fall asleep in the pose, which is fine in the beginning. However, the practitioner is supposed to remain awake but relaxed the entire time.
- Try to keep the awareness to your breath only.
This is all for now. I hope you enjoyed reading these detailed top easy yoga pose guides for starting your yoga journey with mindfulness and a corrective scientific approach. Trust me it’s worth trying!!!. For more information kindly read the beginner’s yoga guide FAQs below:
FAQs:
How to do yoga at home step-by-step guide for beginners?
- Make sure there is 2 horse meal gap before you start your practice.
- A cold or taped shower is recommended.
- Wear clothes which are comfortable neither too loose nor too tight.
- Make sure that you are practicing in an open and ventilated room or place.
- Use a yoga mat while practicing to avoid any kind of inconvenience during the practice.
For how many minutes a beginner should practice yoga?
Ans: It entirely depends on the stamina of the practitioner. 15 to 20 minutes is the ideal time to start with. As you get more and more comfortable you can practice from 30 mins to up to 1 hour.
It is recommended from our side to prepare the body first with an easy yoga pose then move deeper into practice accordingly.
Which type of yoga would be best for a beginner and why?
Ans: It is recommended to start with hatha yoga as it does not require any special skills from the beginner practitioner. Firstly, it is important to understand the fundamental aspects of yoga at physical, mental, and spiritual levels. All of the yoga forms (Ashtanga Vinyasa, Yin Yoga, Vinyasa, Iyengar, Bikram yoga, etc) are derived from hatha yoga itself. Hence to start with Hatha yoga is the optimum decision and it can also prepare one for advanced practices.
How many times a week one should practice yoga to see results?
Ans: As we all know yoga is not a physical workout or exercise system. Therefore, to get the most optimum results it is better to practice every day. However, considering the modern lifestyle, 3 to 4 days are the usual recommendations if one is practicing for 30 minutes to one hour at least. Apart from that, there are not any side effects of practicing less. So, try to stick to your yoga practice as much as you can. I would say even if you are doing yoga once or twice a week you will still get results.
When Should I practice yoga in the morning or at night?
Ans: If we look at the traditional practice styles it is recommended to practice yoga either before sunrise between 3 a.m to 8 a.m or during/after sunset between 5 p.m to 7 p.m. The scientific approach behind this idea is that yoga practices channel the energy systems in the body, Ojas (a form of energy) is produced within the human system which increases heat in the body. Hence, due to the incline in temperature after sunrise during the day the outer environmental conditions can damage or exert a harmful effect on the body.
